How to use Xcode with almost any C++ project
- modified:
- reading: 4 minutes
I’m new in Macs. I have been using it only for 6 months. Not a long time, especially comparing to how much I spent in Windows. In these 6 months mostly I was working with JavaScript and Python, but recently I needed to do some C++ development.
I always wanted to try Xcode, for various reasons. One of them was to find out if this is true or not, that folks are saying about Visual Studio. That it is the best IDE. I’m not going to talk about this today. My first impression was … weird, anyway I want to spend more time before doing some conclusions. For now if you never used Xcode and you want to try it, start your experience from watching video Xcode Core Concepts.
As I said I’ve never used Xcode before. More than that I only used Visual Studio and MSBuild for professional C++ development. Saying professional because I also played with Borland C++ in Collage. Anyway, I’m just trying to make a point, that I haven’t used Xcode, cmake, make, gcc and all other related to C++ stuff out of Visual Studio and MSBuild.
Because Visual Studio was showing me for a long time that using IDEs is helpful I decided that I should try Xcode when I got something to do with C++ code. And at first of course I realized that there are not so many C++ projects which support Xcode project system.
At first I tried really rough approach. I created new C++ workspace and added all my C++ files to it. After that I realized that I still cannot debug my process. But this one was really easy to fix: I create new project with External Build System:
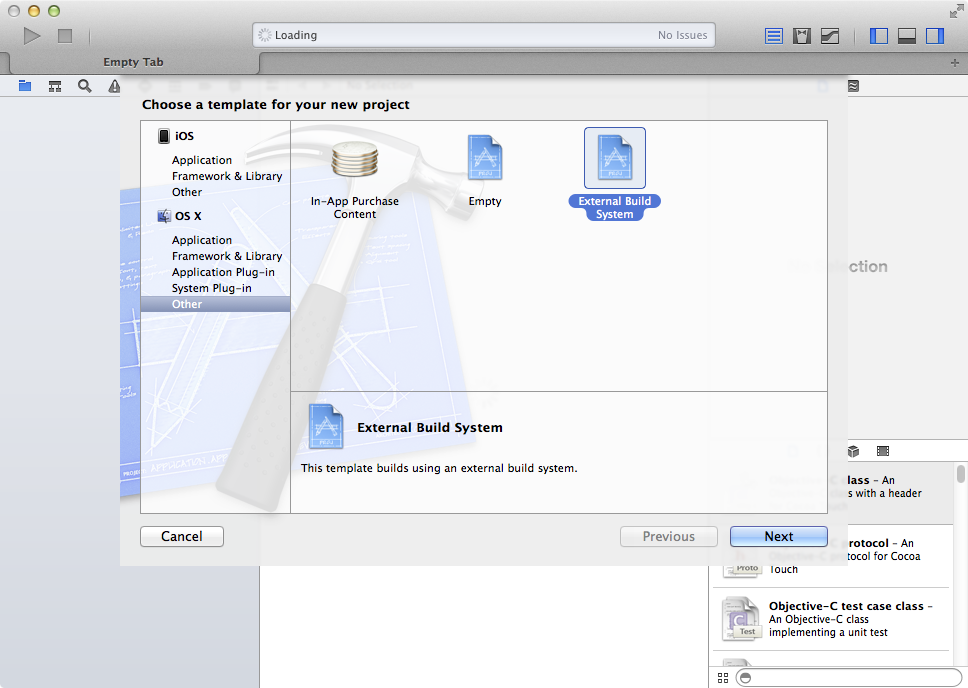
After day or two I realized that I do not have IntelliSence in Xcode. I started to look again what else I need to do and I’ve found this Xcode 4 Code Completion for External Build Projects.
I was happy, but not satisfied. I wanted to have build system as well. At first I thought that I should just write some script which will generate Xcode project system from make files. You don’t know what was the relief for me when I found out about Generators in cmake.
This means that you can use any IDE (Xcode, Visual Studio and any other) from this list for any C++ project which supports cmake (cross platform make). I will show you on example of Casablanca project. It is a C++ REST SDK from Microsoft. I’ve used it couple times when I was working in Microsoft. From my opinion the best (and the one?) library for making REST calls from C++.
The point of next chapter is to show you that can try
cmake -g Xcodewith anyc++project which is supportingcmakeas a build system.
Casablanca and Xcode
I was using Xcode 5.1.1, Casablanca 2.0.1, cmake 2.8.12.2, openssl 1.0.1g, boost 1.55.0.
At start we will do everything the same as Casablanca suggest in documentation Setup and Build on OSX. At first you need to install homebrew (of course you can install next libraries manually, but why?), after that verify that you have all dependencies installed
brew install cmake git openssl boost
Clone sources
git clone https://git01.codeplex.com/casablanca
Prepare folder for project system (Casablanca suggest to have build.release folder, don’t know why, maybe they have in scripts somewhere name of this folder)
cd casablanca
mkdir build.release
cd build.release
And next step will be different from official documentation, you need to launch cmake with additional parameter
cmake ../Release -DCMAKE_BUILD_TYPE=Release -G Xcode
After that you should have Xcode project under build.release folder in casablanca.xcodeproj. Open it
open casablanca.xcodeproj
You should see Xcode (I hope you have installed Xcode on your Mac, right?) with opened casablanca.xcodeproj
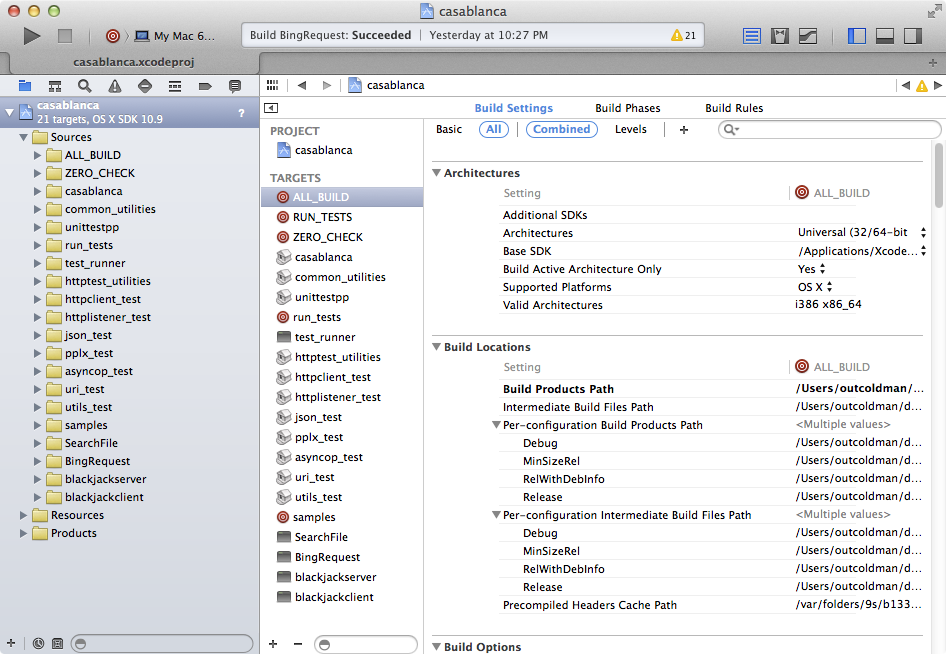
By default it selects ALL_BUILD target, which just builds everything. You can try to build it. It should just work. It will take some time and at the end you should get successful build.
Now let’s try to use one of the samples BingRequest. Change current target to BingRequest
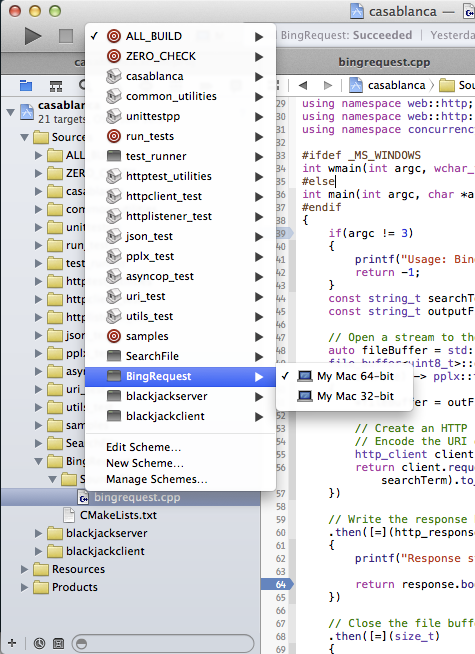
This sample expects two arguments on input. First is what you want to search in Bing, second is the file name where you want to save response. So, let’s modify the scheme (I get to this window by pressing ⌥ key and clicking on play button)
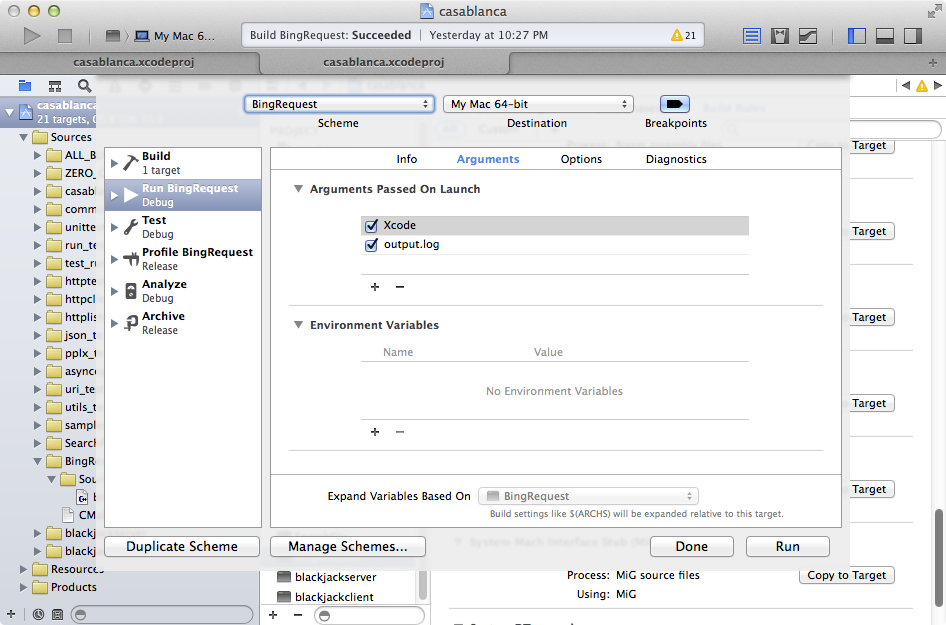
As you can see I specified Xcode as a first parameter and output.log as second. Now let’s put some breakpoints and press play button to debug it
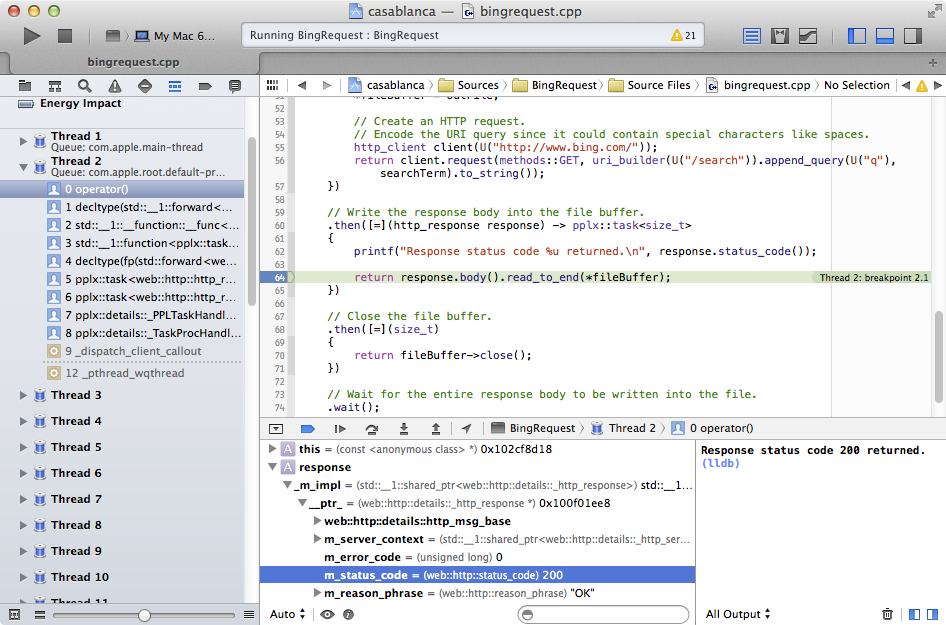
As you can see - it works. Happy debugging!